With a catalog, you can manage all of your backup and recovery activities from one repository. The advantage of this is that if you have multiple databases to maintain, you’re storing all of your backup and recovery metadata in one place.
Step 1 :
Connect to the catalog database and create a tablespace for the catalog:
Linux :
SQL> Create tablepsace rman_ts datafile ‘<directory>/<name>’ size 20m default storage (initial 100k next 100k pctincrease 0);
Windows :
SQL>CREATE TABLESPACE rman_ts DATAFILE ‘E:\DATABASE\rman_ts.DBF’ SIZE 20M AUTOEXTEND ON NEXT 10M;
Step 2 :
Create a user and schema for the recovery catalog
Linux :
SQL>create user rman_db01 identified by rman_db01 default tablespace rman_ts quota unlimited on rman_ts;
Windows :
SQL>create user rman_db01 identified by rman_db01 default tablespace rman_ts quota unlimited on rman_ts temporary tablespace temp;
Step 3 :
Grant the roles and privileges to this user to maintain the recovery catalog and perform the backup and recovery operations.
Windows & Linux:
SQL>grant recovery_catalog_owner to rman_db01;
SQL>grant connect,resource to rman_db01;
Note :
The below screen shot shows the execution of the above 3 steps

NOTE :
1)Make sure that passworfile for the target DB exits.If its not there then create as follows
There are two syntax for password file creation.In one syntax pwdfile is created in the directory
from where ur excuting the script and in another syntax u specify the location of pwdfile.

2) Ensure that the listener is running @ catalog DB.
Procedure to create a recovery catalog :
Step 4 :
(a)Login to the operating system and issue the RMAN command to invoke the RMAN command interpreter.
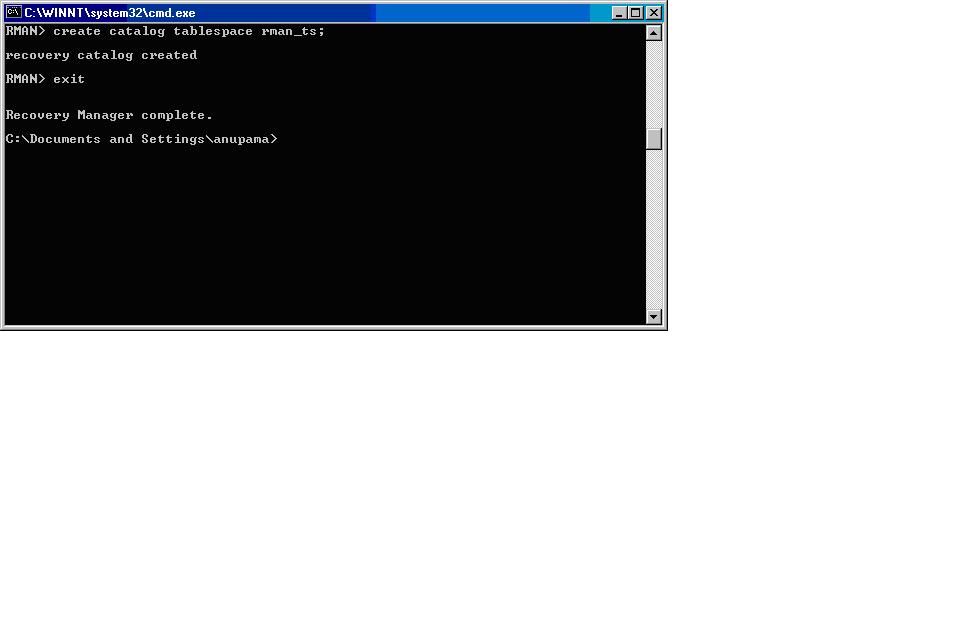
(b)Create the catalog.
(c)Use the LOG option enables RMAN to output messages and commands to a file.
Windows & Linux :
C:\>Rman catalog rman_db01/rman_db01@catdb log=catalog.log
Rman>Create catalog tablespace rman_tbs;
Rman>Exit;
Note :
The sub steps (a),(b),(c) are shown in the below screen shot.


Note: A log file called catalog.log will be created by the RMAN in the directory from where ur exceuting the command.If ur executing the command being in C drive then it will be created there only.
Step 5 :
Connect to the target database.
you must login as the user with the sysdba privilege on the target database to perform all the backup and recovery operations.
In windows platform u must be very careful with ORACLE_SID usage
Suppose u have 2 SID’s in the same machine
ORACLE_SID=MICRON (Target DB)
ORACLE_SID=MICROREP (Catalog DB)
So being in the sid with respective to target db if u want to connect to catalog DB , u should connect as shown below.
First check to which SID it is connected.If it is in TargetDB SID then its ok otherwise set it and connect as follows :
->Inorder to connect to the target db & catalog db at the same time
C:\>set ORACLE_SID=micron (default DB or the target DB)
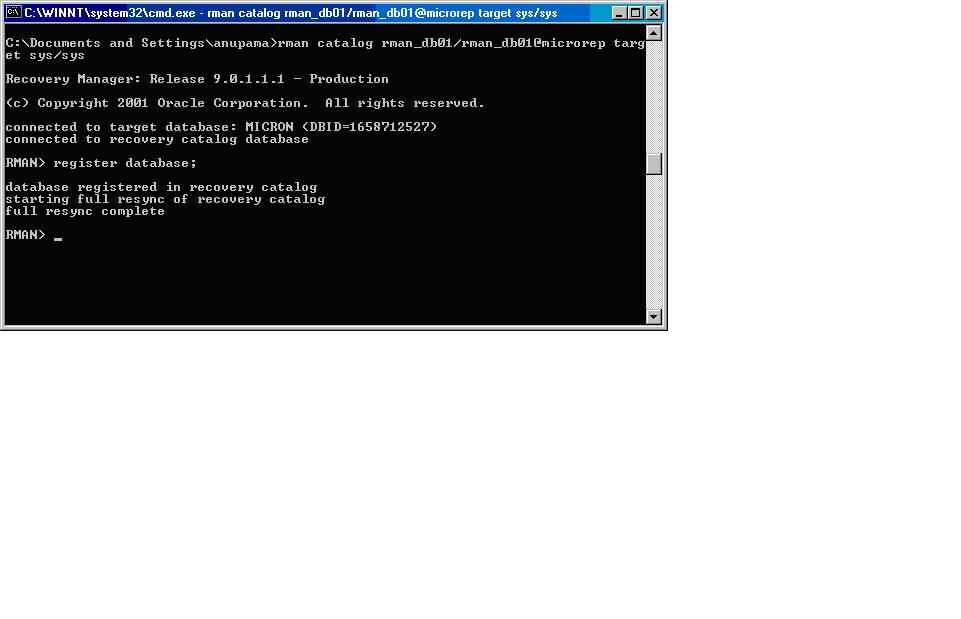
C:\>rman catalog rman_db01/rman_db01@microrep target sys/sys

Here microrep is the catalog DB
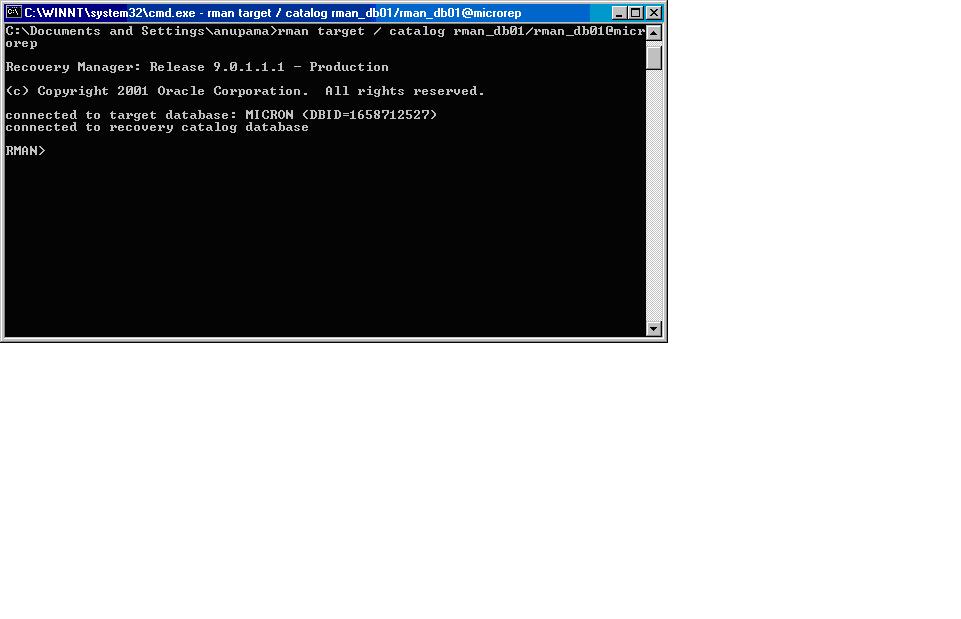
[OR]
C:\>rman target / catalog rman_db01/rman_db01@microrep
Point to be noted :
If ur SID is not set to target db sid thatmeans If ur sid is already set to catalog db then also u can connect but in this situation the target DB and the Catalog DB will be same.Thatmeans ,if suppose ur SID is microrep(i.e.Catalogdb)and u hav issued this command
C:\>rman catalog rman_db01/rman_db01 target sys/sys
Then the it will connect but Target DB & Catalog DB will be same.
Here the ORACLE_SID=microrep which is y it is showing target DB as microrep.

Now if the ORACLE_SID=micron and ur trying to connect to the catalog db without the symbol @ ,u ll get the following error as shown in screen shot.

Step 6 :
Register the target database in the catalog.
Rman creates rows in the recovery catalog that contain information about the target database.RMAN copies all data about the target database from the control file into the recovery catalog.
RMAN>register database;
Summary :
1) Create tablespace
2) Create catalog owner (or) user
3) Grant priviledges to the user
4) Create catalog
5) Connect with target DB
6) Register target in the catalog

July 29, 2008 at 8:13 am
I like the way in which, you post the topics in your blog. It is so interesting to read. The person who is new to oracle,also can understand the concepts easily. keep on posting new topics.
July 29, 2008 at 8:58 am
Well Thanks a lot Mr.Neethul…
I will surely do my best to post topics which will be useful for beginners.
Watch out for upcoming posts…